Preparing for your first horseback trail ride involves much more than choosing a scenic route and packing a few saddlebags. A successful ride depends primarily on the rider's experience, the horse's fitness, the terrain, weather conditions and equipment preparation.
For a first trail ride, the goal should not be to cover as many miles as possible. It is better to plan a ride that proves slightly too easy than a route that either horse or rider struggles to complete.
What riding level do you need for your first trail ride?
Being comfortable in the saddle is not enough
There is no single riding level that determines whether someone is ready for trail riding. The skills required depend on the horse, the length of the ride, the terrain and whether the rider is accompanied.
To ride independently, a rider should at least be able to steer the horse, control its pace and bring it to a stop. They should also remain balanced over uneven ground and know how to maintain appropriate distances between horses when riding in a group.
Riding outdoors introduces situations that are less common in an arena: cars, tractors, bicycles, dogs, wildlife, puddles, low branches, ditches and narrow passages.
For a first experience, riding a horse that is already accustomed to trails and being accompanied by an experienced rider helps avoid combining too many new challenges at once. A guided trail ride with a professional is also a good way to discover this type of riding.
How to choose a route for your first horseback trail ride
Do not judge difficulty by distance alone
Distance alone does not determine how difficult a trail ride will be. Ten kilometres over flat, stable tracks can require considerably less effort than the same distance involving steep gradients, rocky surfaces, mud or long stretches of paved road.
There is therefore no ideal number of kilometres that applies to every horse. Terrain, elevation gain, weather, hoof condition and the horse's fitness must also be considered.
For a first trail ride, look for:
- a familiar or well-documented route;
- few technically difficult sections;
- limited road riding;
- opportunities to shorten the route;
- identified water sources when required by the length of the ride;
- a route that can be accessed offline.
Use documented equestrian routes
The French Equestrian Federation (FFE) provides GeoCheval, a map dedicated to equestrian tourism routes in France.
The FFE states that routes featured on GeoCheval must meet several quality criteria. Depending on the route, the platform can also provide useful information for planning a ride.
Using a documented route does not remove the need to check current conditions before leaving. Flooding, forestry work, fencing or a fallen tree can temporarily make a normally accessible trail impassable.
Check whether horses are actually allowed
A path shown on a map or GPS application is not necessarily open to horses. Some routes may cross private property or be subject to local or temporary restrictions.
You should therefore check that horses are permitted along the entire route rather than treating an old GPS track as proof that access is authorised.
Preparing your horse physically for trail riding
Increase the workload gradually
A horse living at pasture is not automatically fit enough to carry a rider for several hours across varied terrain.
In its resources on horse training, the French Horse and Riding Institute (IFCE) emphasises the importance of progressive preparation adapted to the individual horse.
Preparation for trail riding can gradually increase:
- the duration of rides;
- elevation gain;
- the variety of surfaces;
- the amount of time spent walking;
- riding in groups;
- exposure to situations encountered outdoors.
This progression should remain individual. The horse's age, health, fitness, hoof condition and the expected workload all influence what it can reasonably manage.
Lameness, injury, pain, unusual lethargy or abnormal behaviour are reasons to postpone the ride rather than continue with the original plan.
Preparing your horse for situations encountered outdoors
Physical fitness is only part of trail preparation. A horse may work regularly in an arena while having little experience of situations encountered outdoors.
Before a longer trail ride, it is useful to gradually introduce the horse to:
- cars and agricultural machinery;
- bicycles;
- dogs;
- water crossings;
- changes in ground surface;
- low branches;
- narrow passages;
- waiting behind other horses;
- temporary separation from the group.
This training should be progressive. The aim is not to deliberately frighten a horse in the name of "desensitisation", but to allow it to experience different situations under sufficiently controlled conditions.
For a first trail ride, having both an inexperienced rider and an inexperienced trail horse adds unnecessary difficulty.
Check your horse's hooves before leaving
Hooves can be subjected to considerable stress when a horse spends several hours travelling over different surfaces.
Before leaving, check the hooves and make sure that trimming, shoeing or hoof boots are appropriate for the individual horse and the planned terrain.
New hoof protection should be tested during shorter rides before a longer outing to check that it remains secure and does not cause rubbing.
A horse does not necessarily need to be shod for trail riding. Some horses comfortably travel barefoot, while others are shod or use hoof boots. The appropriate choice depends on the horse, its hooves, the terrain and its workload.
Check the saddle and saddlebags
Do not test a new saddle on the day of the ride
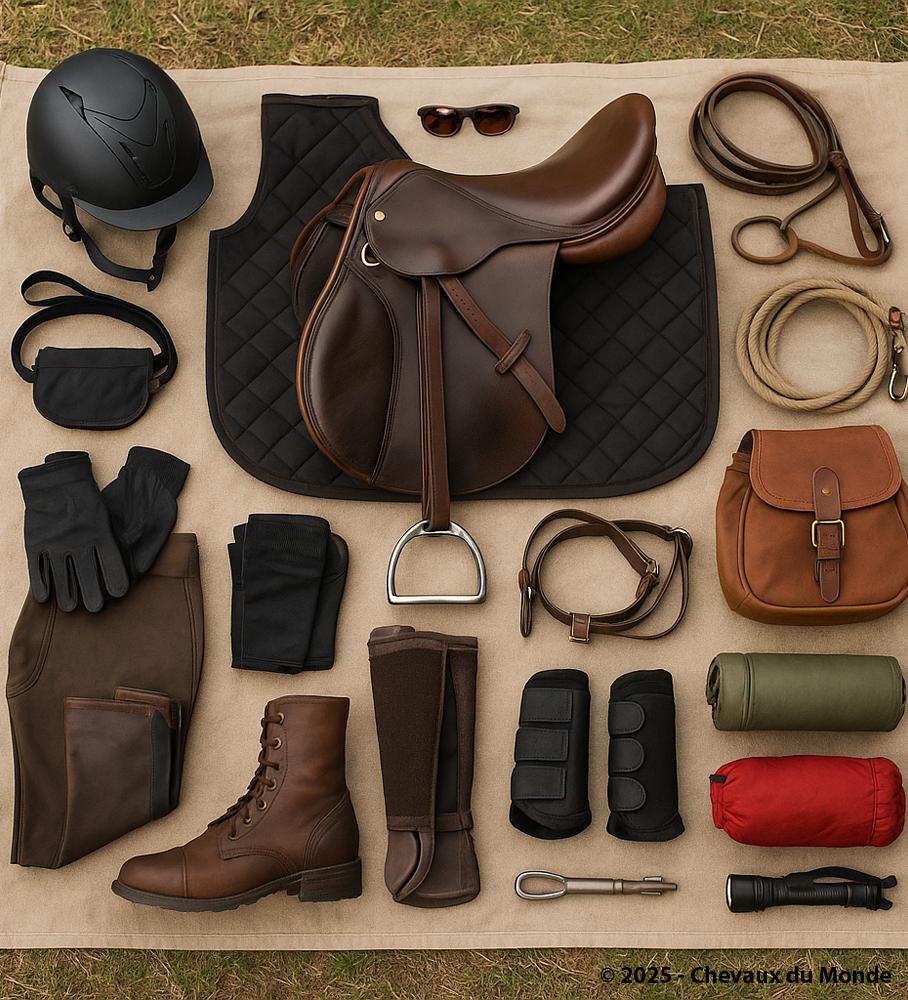
The saddle, saddle pad, girth and bridle should be suitable for the horse and already tested before a long trail ride.
The longer a ride lasts, the greater the potential consequences of a minor fit or rubbing issue. Before leaving, check stitching, billets, stirrup leathers, buckles and other fastening points.
Balance the saddlebags
Saddlebags should be securely attached so that they do not repeatedly strike the horse. Their weight should also be distributed evenly between both sides.
Be cautious about rules claiming that every horse can safely carry a specific percentage of its body weight. Carrying capacity cannot be determined by a single percentage alone. Horse and rider conformation, fitness, saddle fit, terrain, pace and duration of exercise all matter.
For a first day ride, keeping luggage light makes preparation considerably easier.
Plan water stops and consider the heat
Anticipate the horse's water needs
Water should be considered before setting out. A stream or trough marked on an old map may be inaccessible, dry or contain water of uncertain quality.
Resources from the IFCE about heat stroke in horses show that water losses through sweating can become substantial during exercise, particularly in hot and humid conditions.
These figures should not be interpreted as the amount of water every horse loses during a quiet trail ride. They demonstrate why temperature, humidity and exercise intensity must be considered when planning a ride.
The French Ministry of Agriculture also notes that horses' water requirements can vary considerably depending on their living conditions and activity.
Adapt the ride in hot weather
The IFCE identifies horses undergoing physical exercise with little or no prior conditioning among those more vulnerable to heat stroke.
In hot weather, the intensity of the ride should therefore be adjusted, access to water should be planned and the horse's recovery should be monitored carefully.
Breathing that remains abnormally elevated, severe fatigue, unusual movement or a marked change in behaviour are reasons to stop exercising and assess the situation.
What should you take on a horseback trail ride?
Equipment for the rider
For a straightforward day ride, useful equipment includes:
- a properly fitted riding helmet;
- appropriate riding footwear;
- drinking water;
- a snack;
- a fully charged phone;
- a power bank when necessary;
- protection from rain, cold or sun;
- an offline map or GPS route;
- a small first-aid kit.
The phone should ideally remain on the rider rather than solely in the horse's saddlebags. If the rider falls and the horse runs off, the phone remains accessible.
Equipment for the horse
Depending on the route and equipment used, you may also want to carry:
- a halter and lead rope;
- an appropriate first-aid kit;
- basic equipment for temporary tack repairs;
- the horse's usual hoof protection;
- reflective equipment when visibility requires it.
Veterinary medicines should not be administered without appropriate guidance. To prepare an equine first-aid kit and learn how to respond to common injuries, discuss its contents with your veterinarian beforehand.
Riding a horse on public roads: what does French law say?
Road sections should be kept to a minimum on a first trail ride, particularly when they involve fast or heavily travelled roads.
In France, several provisions of the Highway Code apply directly to people leading or riding animals on public roads.
Article R412-44 of the French Highway Code establishes that an animal travelling alone or in a group must have a person responsible for controlling it.
The section of the French Highway Code covering animals on public roads also sets out rules concerning their position on the road and the requirement not to obstruct traffic.
These are French regulations. Riders travelling elsewhere should check the highway and access rules that apply in the relevant country or region.
Complying with road regulations does not automatically make a road suitable for horseback riding. For a first trail ride, reducing exposure to motor traffic remains preferable.
Do not rely entirely on GPS
A phone can be dropped, run out of battery or lose its network connection. Downloading the route before leaving and knowing the main landmarks along the way provides an additional layer of security.
GeoCheval provides access to documented equestrian routes in France, but no application replaces observing the conditions on the ground.
If the GPS route leads towards a closed, dangerous or impassable trail, a digital track should never be a reason to continue regardless of the conditions.
Tell someone where you are going
Before leaving, someone who remains at home or at the yard should know:
- the planned route;
- the starting point;
- who is taking part;
- the approximate return time.
If the route changes significantly during the ride, let that person know when communication is possible.
Location sharing can provide additional security, but it depends on the phone, its battery and potentially network coverage. It should not replace leaving basic information about the ride beforehand.
Monitor your horse throughout the ride
A route planned on a map is a plan, not an obligation. It can always be shortened.
During the ride, monitor the horse's movement, breathing, sweating, general attitude and recovery.
Walking naturally plays an important role in trail riding. Faster paces should only be used when the terrain, visibility and level of control make them appropriate.
If the horse shows discomfort, unusual fatigue or a change in movement, continuing simply because the destination is nearby is not a good reason to push on. Stop, assess the situation and shorten or end the ride when necessary.
What should you check after a trail ride?
The ride does not end as soon as you dismount.
After removing the tack, check:
- the back and girth area;
- the legs;
- the hooves;
- any areas of rubbing;
- the horse's movement;
- its general recovery.
The horse should have access to water and gradually return to its normal routine.
Equipment should also be checked. Damaged stitching, a weakened stirrup leather or a saddlebag attachment beginning to fail can then be repaired before the next outing.
Common mistakes to avoid on your first trail ride
Planning a route that is too ambitious
You do not need to ride dozens of kilometres for an outing to qualify as a trail ride. A first ride should primarily help you discover how both horse and rider cope with spending several hours outdoors.
Combining too many new things
A new saddle, new saddlebags, an inexperienced horse and an unfamiliar route create a lot of variables for one day.
Testing equipment and new situations progressively reduces the risk of problems and makes their cause easier to identify when something does go wrong.
Riding alone without enough experience
An experienced rider can trail ride alone after considering the additional risks involved. For a first trail ride, being accompanied means navigation and unexpected situations do not have to be managed entirely alone.
Feeling that you must complete the planned route
A planned route is never an obligation. If the weather deteriorates, the terrain becomes impassable or the horse shows signs of fatigue or pain, shortening the ride or turning back is a sensible decision.
How to make your first horseback trail ride successful
A good first trail ride ultimately relies on a few simple principles: a prepared horse, a sufficiently capable rider, previously tested equipment, a reasonable route and enough flexibility to change the plan.
There is no need to begin with a long-distance ride or an overnight trip. A few hours on the trail can already teach you a great deal about your horse's behaviour outdoors, the equipment you actually need and how both of you cope with prolonged exercise.
Longer rides can come gradually as both horse and rider gain experience.
The best measure of a successful first trail ride is therefore not the number of kilometres recorded by a GPS, but a horse that recovers normally and a rider who remains capable of safely managing the horse and unexpected situations all the way home.
Frequently asked questions about your first horseback trail ride
Can a beginner go on a horseback trail ride?
Yes, provided the ride is genuinely suited to beginners. A guided trail ride on an experienced horse is much more appropriate for a beginner than riding independently.
How many kilometres should a first trail ride be?
There is no universal distance. Terrain, elevation, weather, duration, hoof condition and the horse's fitness are just as important as the number of kilometres. For a first ride, leave a margin and choose a route that can be shortened if necessary.
Should you ride alone on your first trail ride?
Generally, this is not the safest option. Riding with an experienced person means you do not have to manage the horse, navigation and an unexpected incident entirely on your own.
Does a horse need shoes for trail riding?
Not necessarily. Some horses trail ride barefoot, while others are shod or use hoof boots. The appropriate hoof protection depends on the individual horse, its hooves, the terrain and its conditioning.
What should you do if your horse seems very tired?
Stop exercising in a safe place and assess the horse's breathing, movement and behaviour. If the signs are severe, persist or suggest a condition such as heat stroke, contact a veterinarian promptly.
Sources and references
- French Equestrian Federation (FFE) – GeoCheval and equestrian tourism routes
- GeoCheval – Map of equestrian routes in France
- French Horse and Riding Institute (IFCE) – Resources on horse training
- French Horse and Riding Institute (IFCE) – Heat stroke in horses
- French Ministry of Agriculture – Water management in the equine sector
- Légifrance – French Highway Code: movement of individual animals and groups of animals